
4. Advanced Binary Analysis
Exercise 4: Performing Advanced Binary Analysis
In this lab, we review the process for a customized disassembly of a binary. We will only provide a brief overview of this amazing process. Once you learn Advanced Binary Analysis, you will not face any obstacles in injecting code into the binaries that you are attempting to analyze.
Lab Tasks:
Login to the Software-Test-Linux-32bit machine using studentpassword as Password.
We will review a simple process of code obfuscation that deploys the method of instruction overlapping. The example we are using here is a simple reverse engineering of an exclusive or (xor) binary.
As mentioned in the slides, the assumption is that most instructions are mapped as follows:
a. Each byte in a binary is mapped to at least one instruction.
b. An instruction is contained in a single basic block.
As a result of this, a disassembler does not look for chunks of code to overlap. Consequently, when instructions overlap, it makes it more difficult to reverse engineer.
We can use this technique because x86 instructions vary in length. As a result, the processor does not enforce instruction alignment, which allows for code to occupy the space of another code instruction.
You can disassemble from the middle of one instruction; this will yield another instruction that overlaps the first instruction.
Remember that this is made easy within x86, because of the dense instruction set where virtually any byte sequence corresponds to some valid instruction.
We will be using the simple code example shown in the following screenshot that uses overlapping instruction.
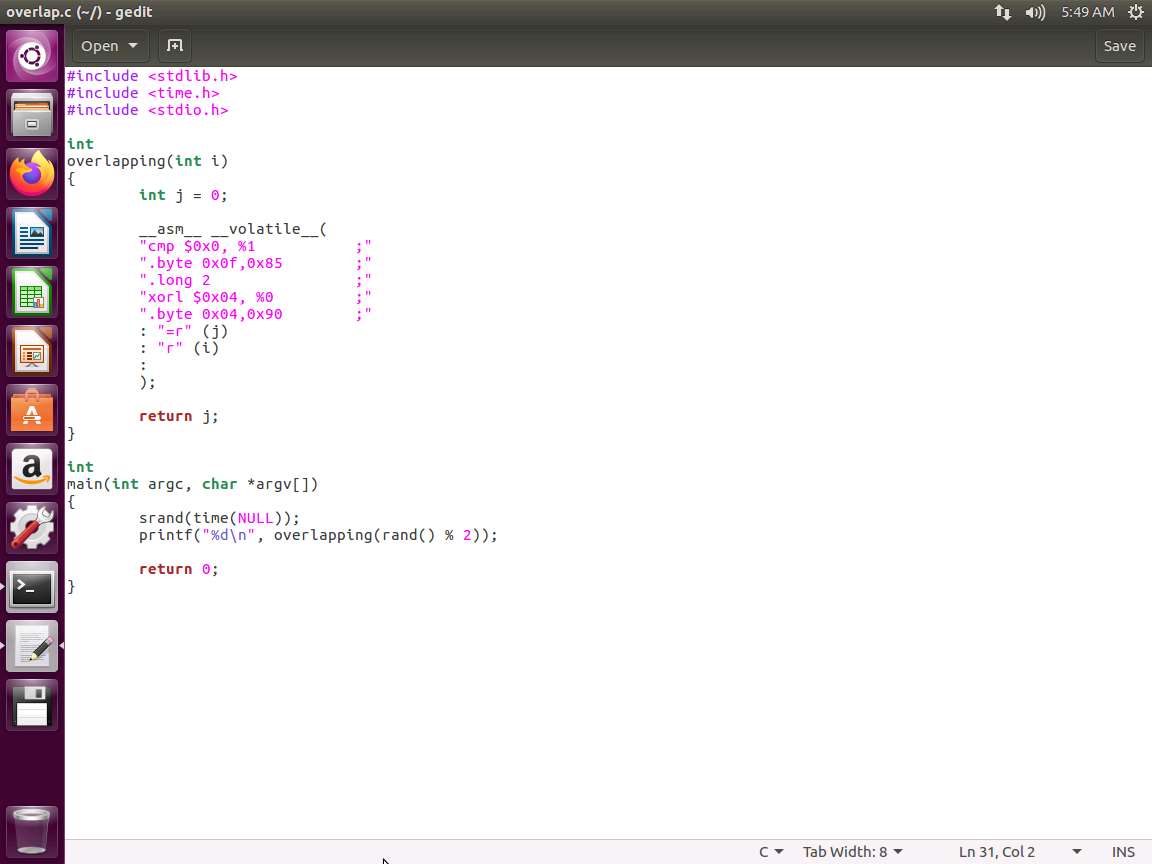
Screenshot Enter the code shown above and save it as overlap.c.
Once you have created and saved the file, compile it by entering gcc -o overlap overlap.c.

Screenshot We can review the example of a simple overlap by entering the following code and examining our simple example and the corresponding object code.
Enter objdump -M intel --start-address=0x4005f6 -d overlap. The output of the command is shown in the following screenshot.
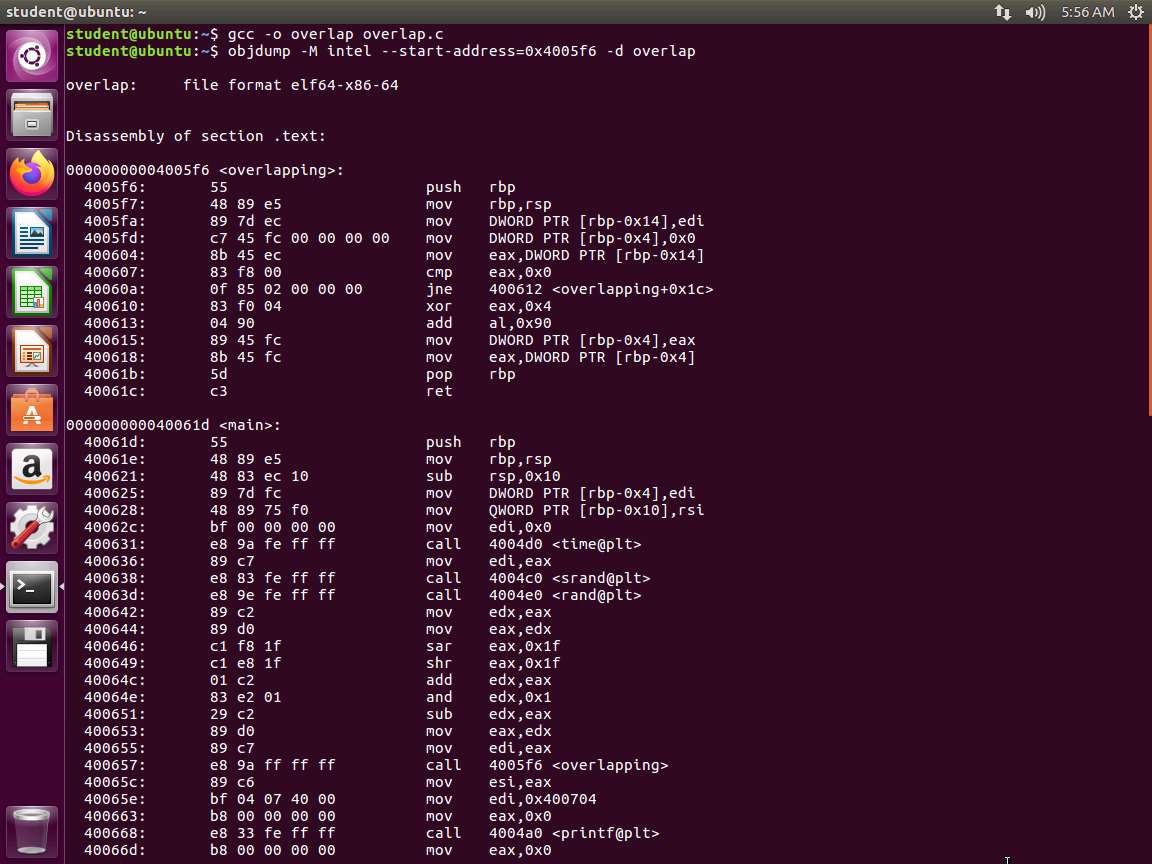
Screenshot As the above screenshot shows, we have the block of code. As you review it, the first address ending in 5f6 is our parameter "i". The local variable "j" is located at an address ending in 60a. Again, the instruction for the jne located at address ending in 60a jumps into the middle of the instruction instead of into an address of the instruction. For example, the instruction that performs the xor is located at the address ending in 610.
Most of the disassemblers will only disassemble these instructions that are shown in the screenshot. As a result, they would miss the overlapping instruction that is located at the address ending in 612.
As the code shows, if i=0, then the jump is not taken, and it falls the rest of the way through the code. The other option is that when i != 0, the hidden code will execute. So how do you determine this? Hopefully, you said by entering the address that the jne is jumping to and if you did, you are correct!
To see this, enter objdump -M intel --start-address=0x400612 -d overlap. An example of the output of this is shown in the following screenshot.
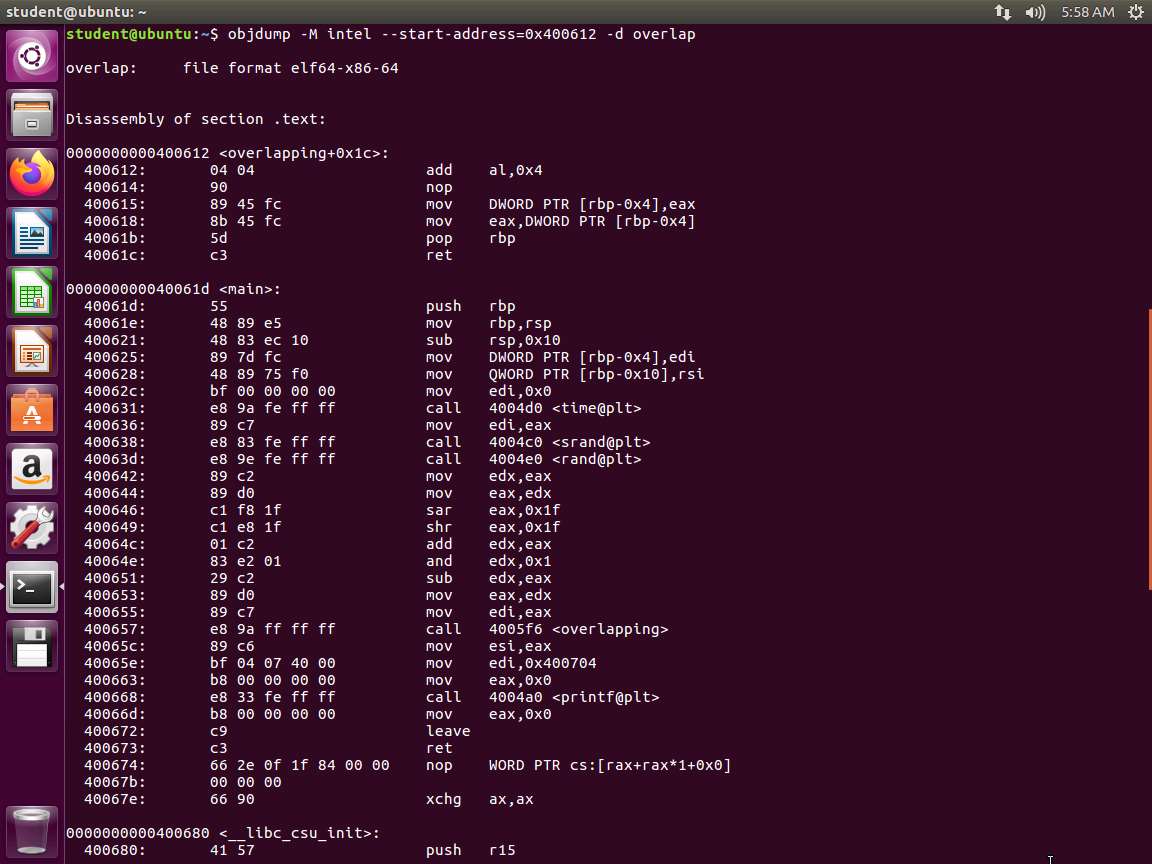
Screenshot As the above screenshot shows, when i != 0 then we take the hidden branch. This result adds the value in al to 0x4, which results in a significant change in the code and changes the return value.
While we did reveal the instruction at the addresses ending 612 and 614 with our reverse engineering, we have now hidden the instructions located at the addresses ending in 610 and 611.
Due to this, we now face another challenge. This is why this process can be time consuming, especially when there are multiple locations where obfuscation is deployed. As with anything else, it takes extensive practice.
The lab objectives have been achieved.
Last updated